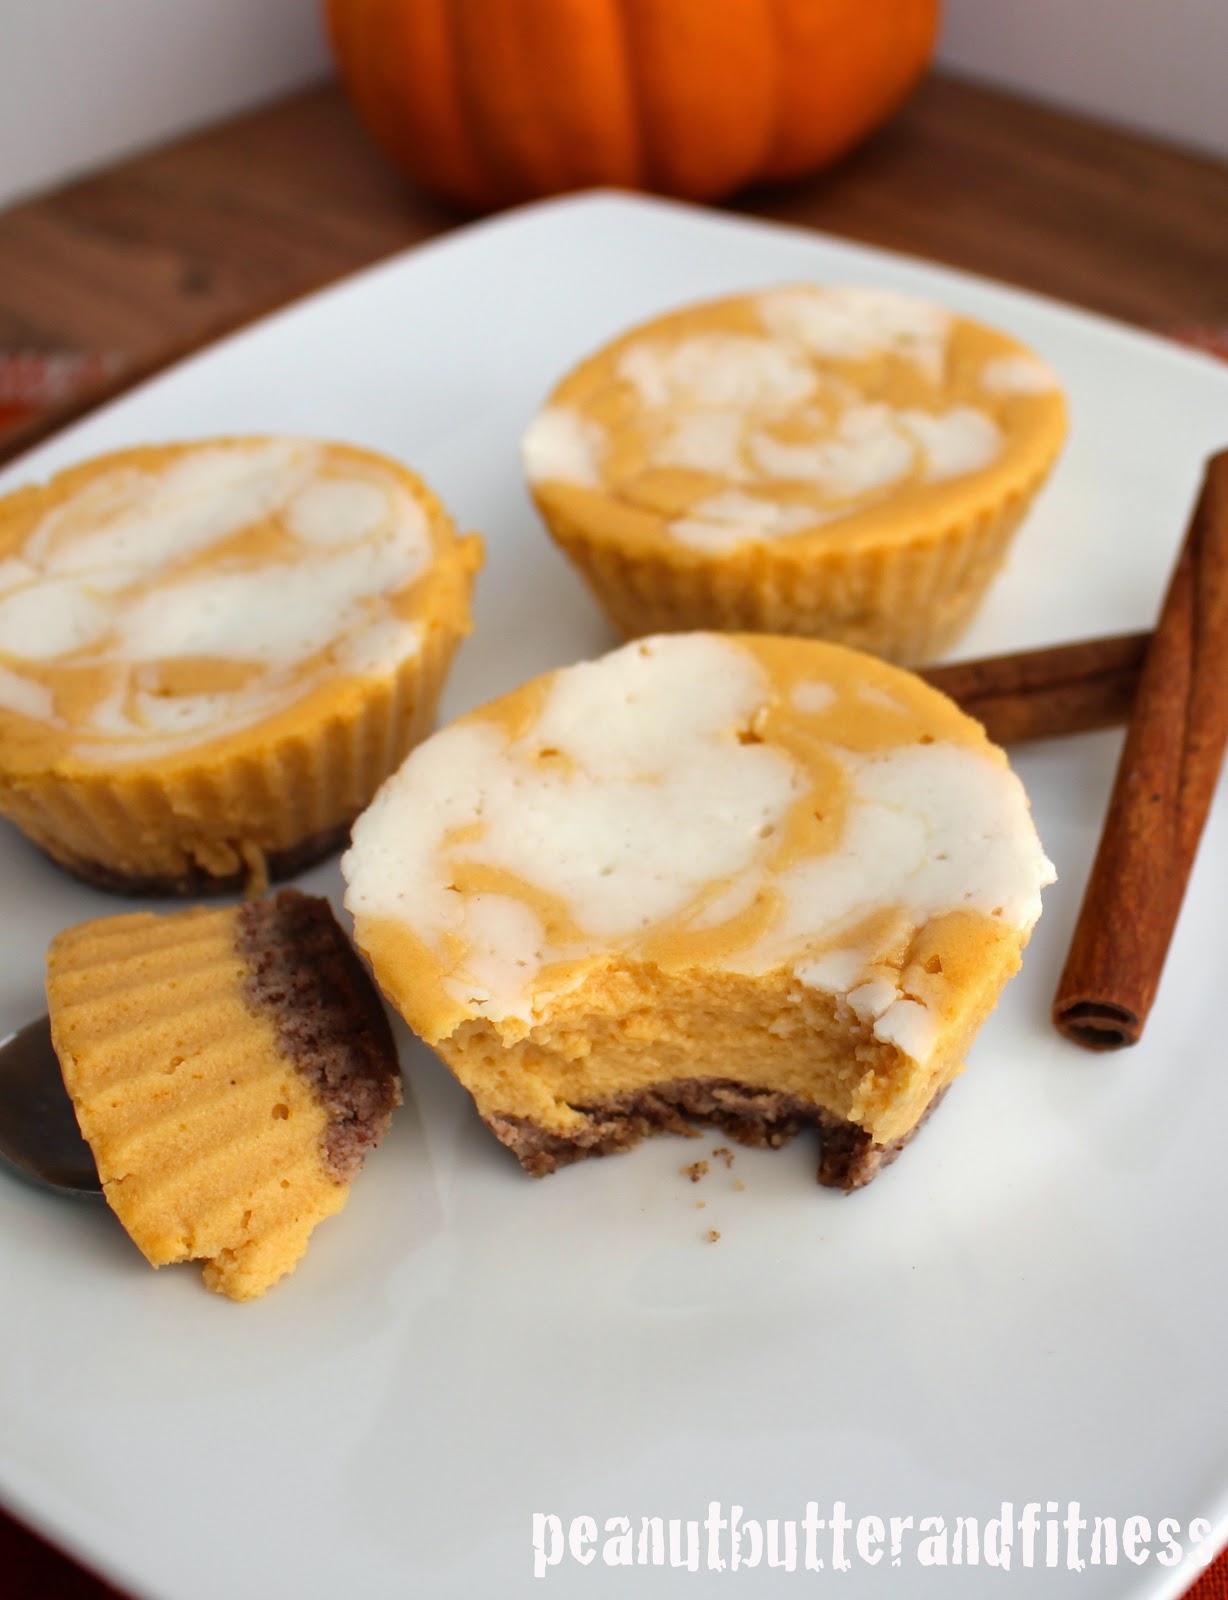
The filling is really easy too – just toss all the ingredients into a Nutribullet and whip it up! It comes out really air and fluffy but that includes air bubbles which need to get worked out before you stick them in the oven. It’s not hard, just tap the cheesecakes on the counter to get them to come to the surface and pop. I didn’t add the extra pumpkin pie spice on my first batch of these, but I think they need that extra little kick of spice so I included it in the recipe below.

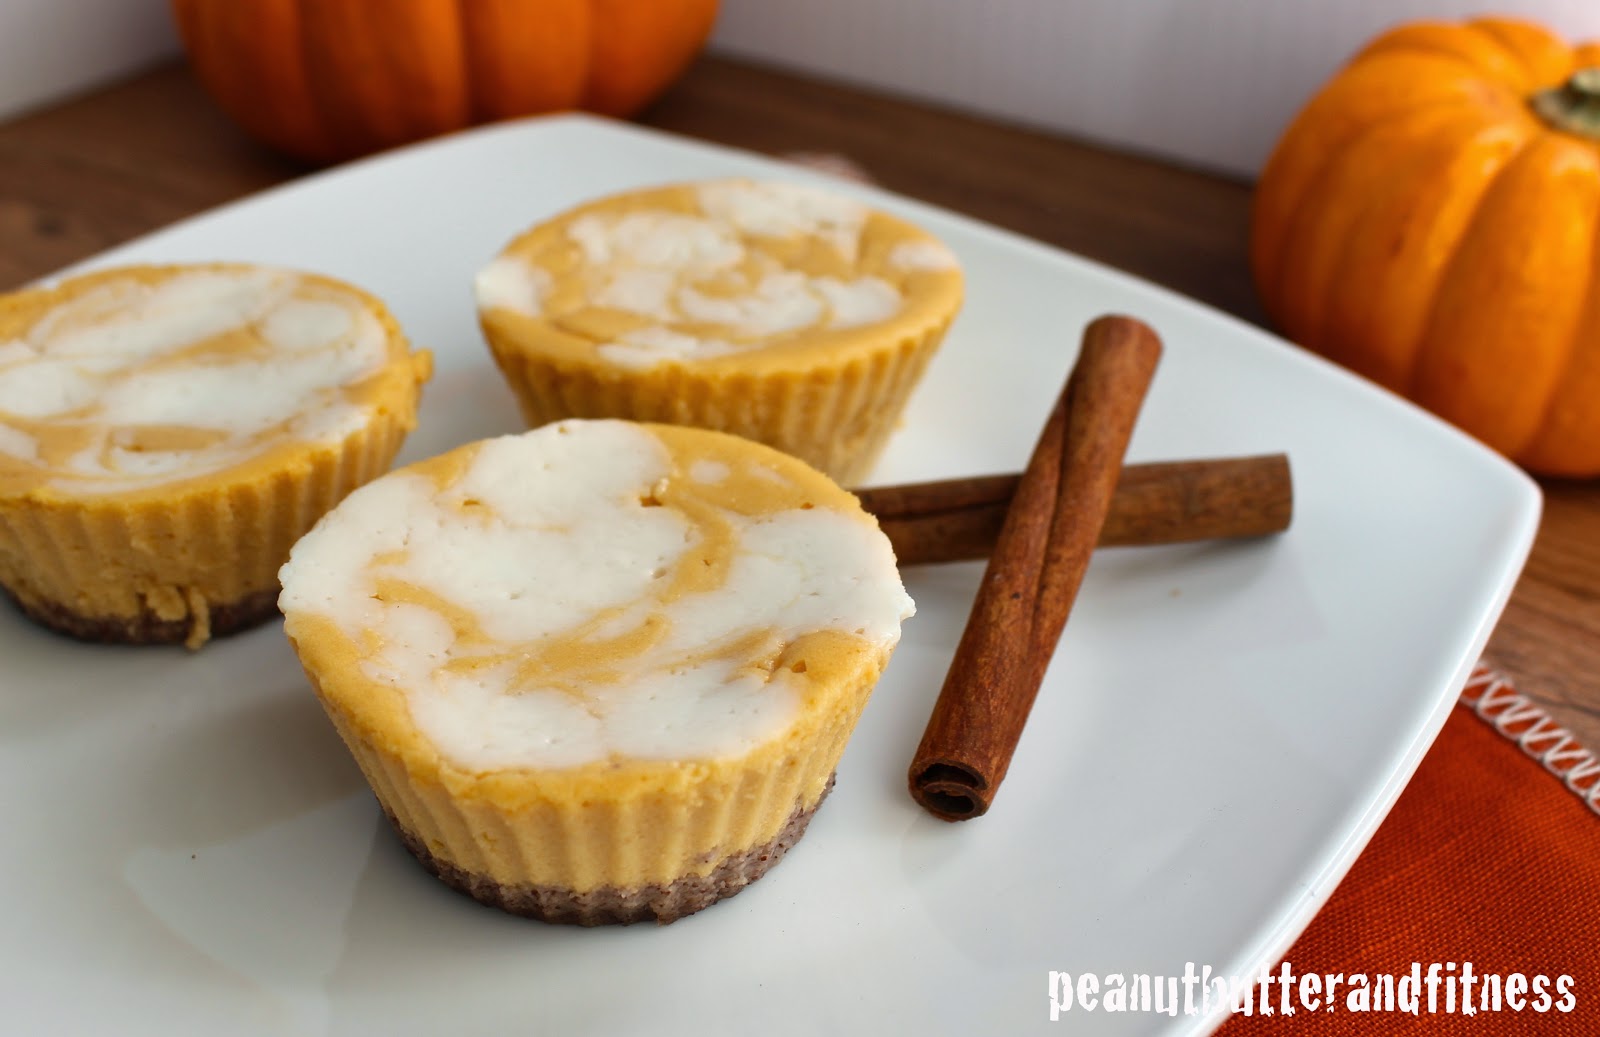
Now for the pretty swirling on top – it’s just some egg white, Greek yogurt and Truvia. Again, super easy. Whisk it up, dribble it on top, and swirl it around. Bada bing, bada boom.


Guiltless Protein Pumpkin Cheesecake
Ingredients
- 1/3 cup fat free cottage cheese
- 1/3 cup pumpkin puree
- 1/2 cup +1 tbsp Dannon Light and Fit non-fat vanilla Greek yogurt, divided
- 2 egg whites, divided
- 1/4 tsp vanilla extract
- 1 1/2 scoop Cellucor Cinnamon Swirl whey protein
- 6 tbsp pecan halves
- 1 1/2 tbsp coconut flour
- 4 packets Truvia, divided
- 1/2 tsp pumpkin pie spice, divided
Instructions
- Preheat oven to 325 degrees.
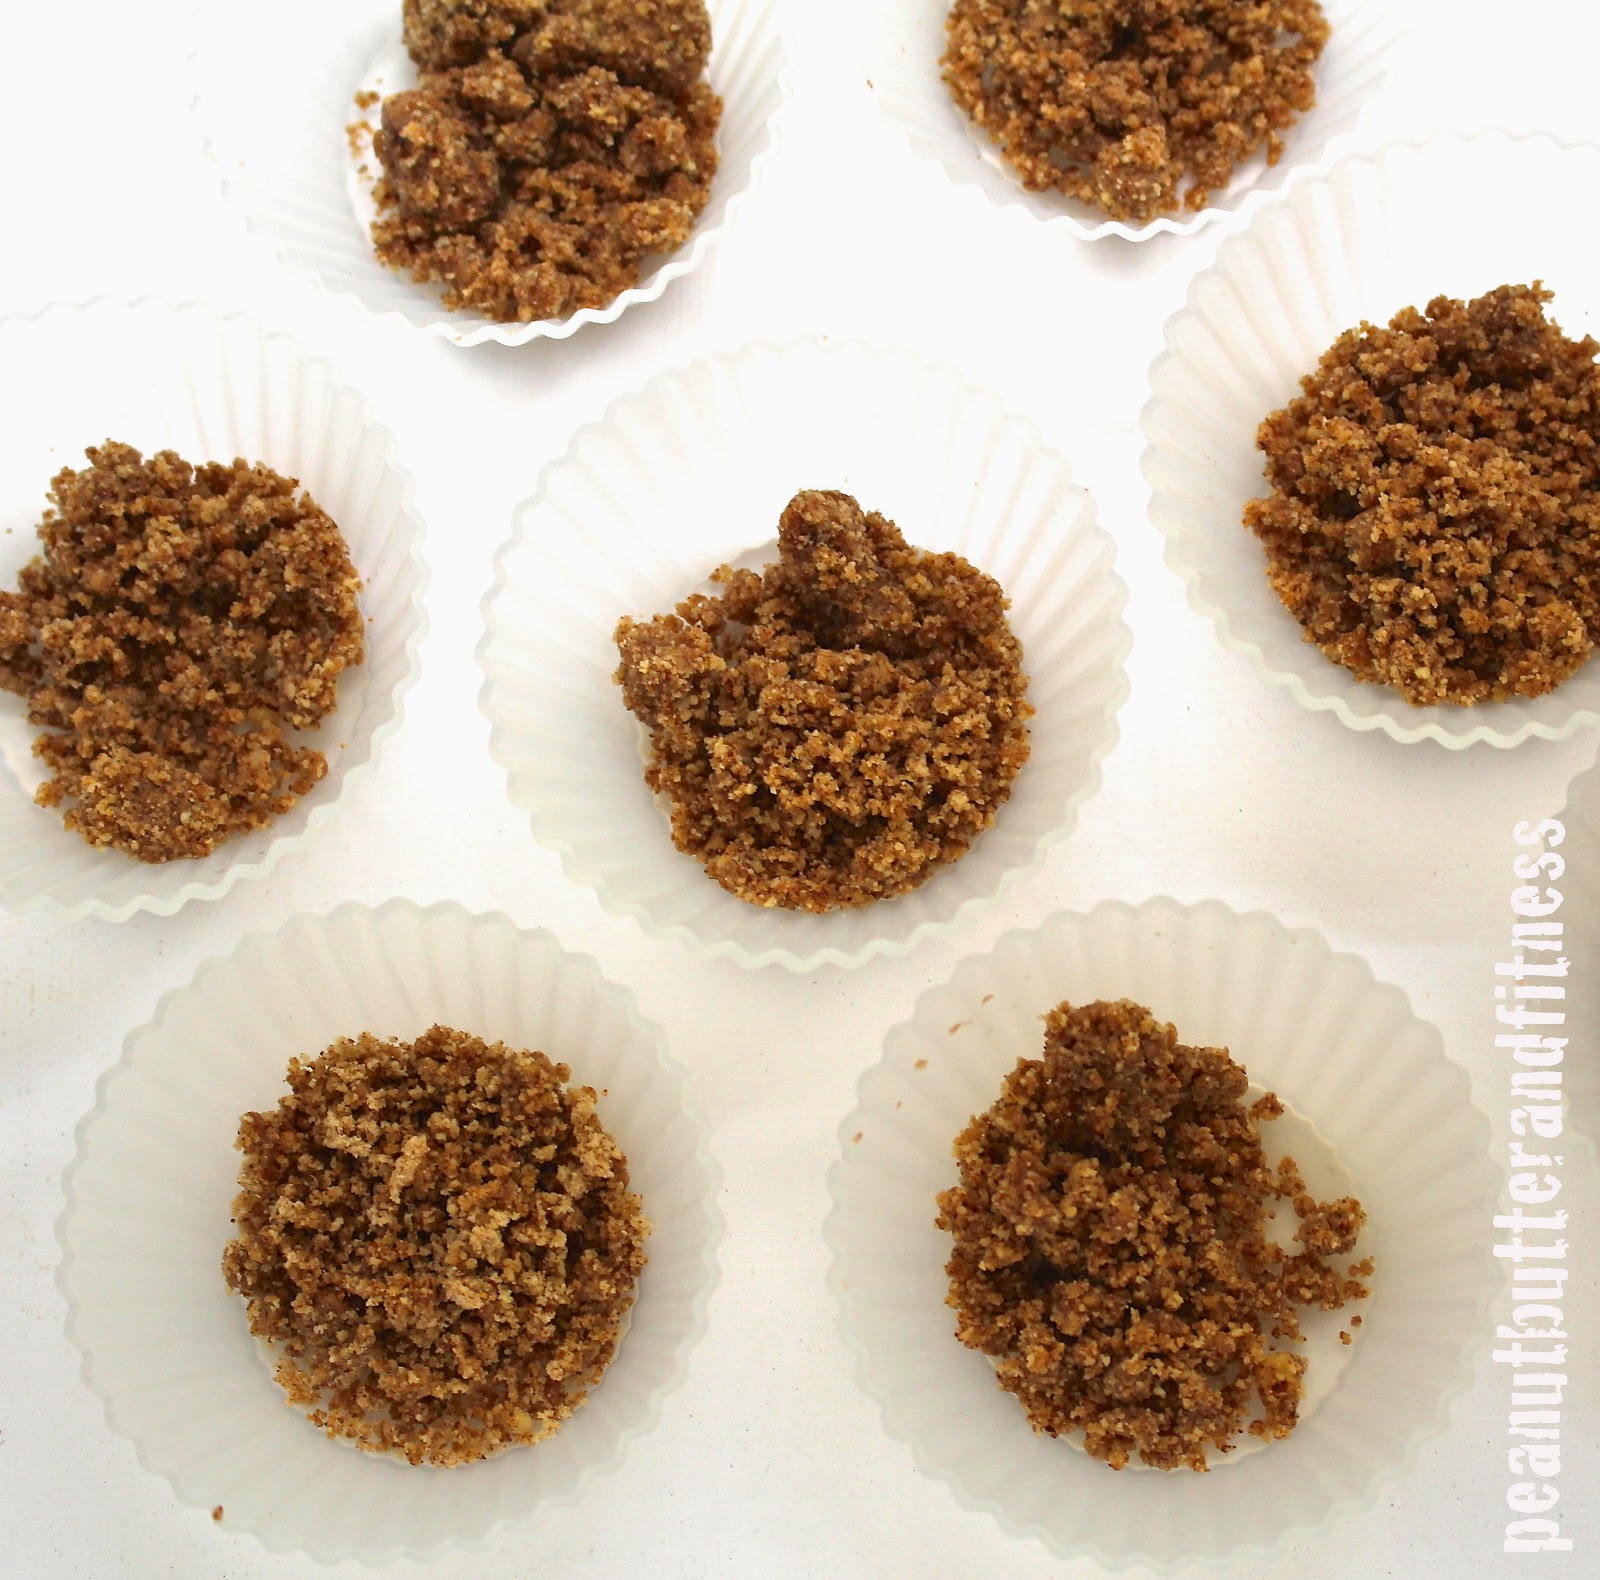
- In a food processor or NutriBullet, mill the pecan halves with the coconut flour and 1/4 tsp pumpkin pie spice. Mix in vanilla extract. Divide evenly into 10 silicone baking cups and press into bottom to form crust. Set aside.
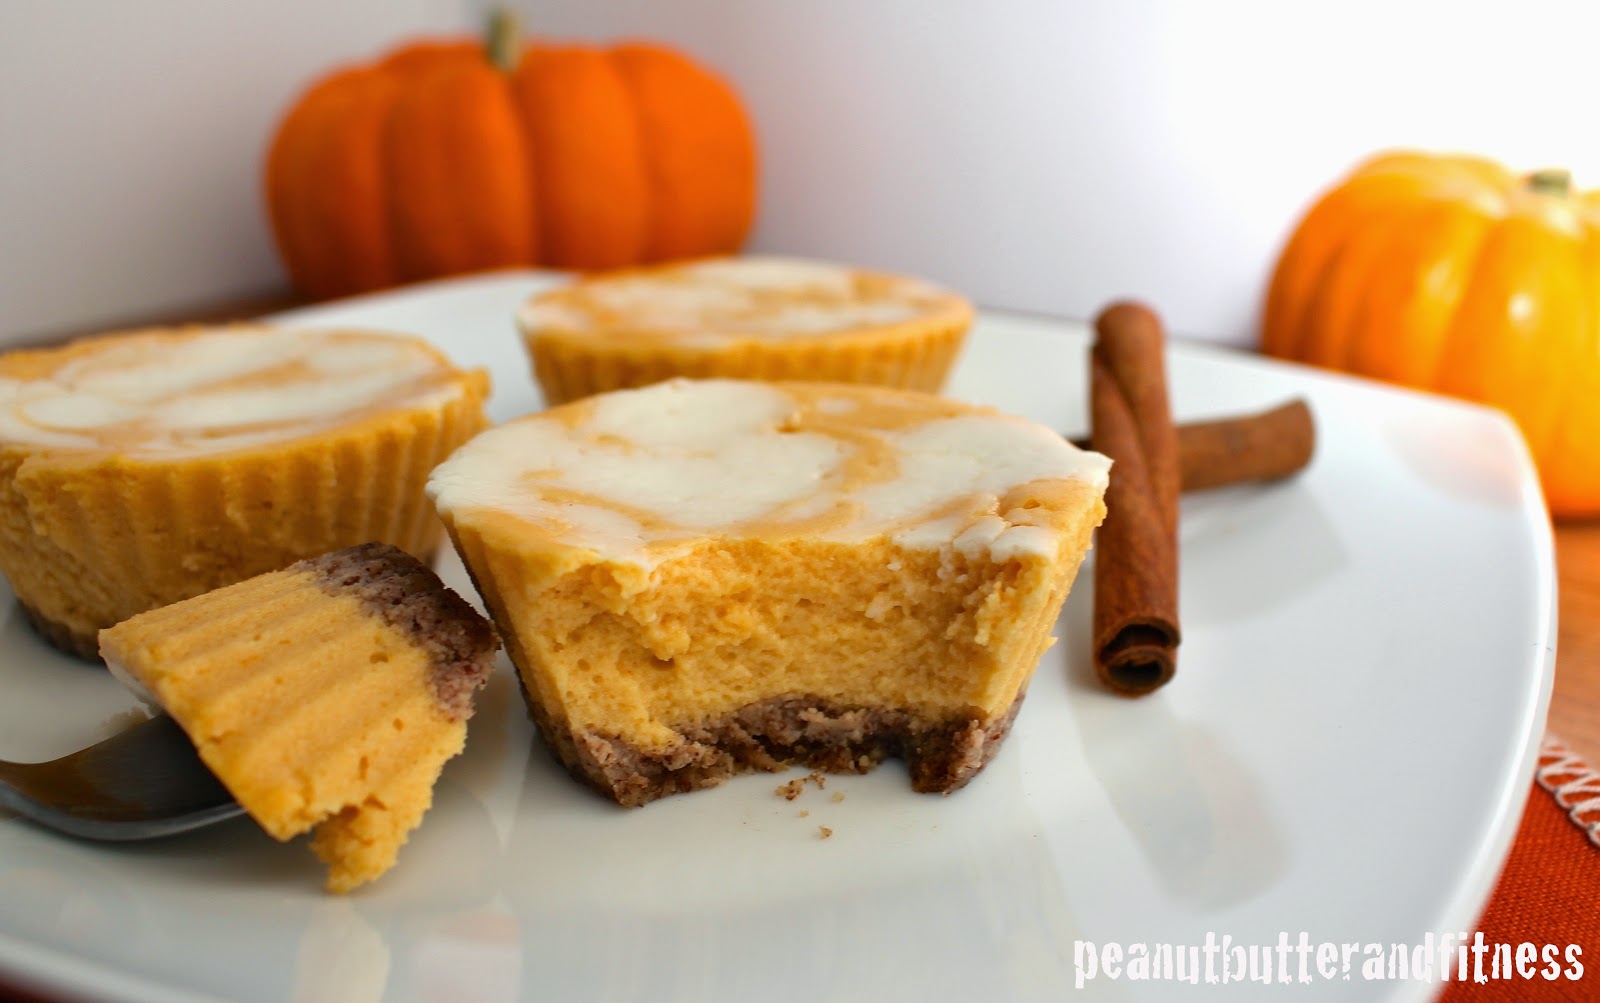
- In a food processor or Nutribullet, blend cottage cheese, pumpkin puree, 1/2 cup Greek yogurt and 1 1/2 egg whites until smooth. Then add protein powder, 2 packets of Truvia and 1/4 tsp pumpkin pie spice and blend until smooth. Pour evenly into baking cups, leaving about 1/4 inch space at the top of the cups. Gently tap on counter top to release any air bubbles.
- In a small dish, whisk together 1/2 egg white (about 1 tbsp), 1 tbsp Greek yogurt and 2 packets Truvia. Place cheesecake cups into larger glass baking dish, then spoon egg white mix in top and swirl with a toothpick.
- Fill bottom of baking dish with water until almost even with the top of the cheesecake filling. Bake at 325 degrees for 25-28 minutes or until centers of cheesecake are still a little jiggly (like Jello).
- Allow cheesecakes to cool in the water bath until water is room temperature, then remove cheesecakes from water bath and refrigerate, uncovered for at least two hours before serving (best if allowed to set overnight).
Nutrition Information
Here’s the trick to keep your cheesecakes from cracking:

You gotta put the little cups into a big baking dish, add water until it’s almost up to the top of the filling (not the top of the silicone cups!), bake away and cool them down in the water. This just helps keep everything baking evenly rather than having the outsides cook faster than the insides, which allows the insides settle down past the top of the edges, making lots of unsightly cracks.